
Wondering whether you should get a humidity dome for your seedlings? What are the benefits and drawbacks of using one? And if you end up getting a humidity dome for plants, how do you use it properly?
Fear not, fellow gardener! I too was once in your shoes and delved into the depths of research and experimentation to uncover the truth about humidity domes. Here’s what I unearthed.
What is a humidity dome for seedlings?
Picture this: a tiny, transparent sanctuary for your budding babies. A humidity dome or germination dome is a nifty contraption made of plastic that acts as a greenhouse for your precious seedlings.
By trapping in moisture and heat, it creates a lush and humid environment that can boost their growth and accelerate germination. Plus, it keeps their soil toasty warm, making it a cozy home for your little green friends.
Do you need a humidity dome for seedlings?
Ah, the age-old question: to dome or not to dome? There’s no clear-cut answer, my green-thumbed friend.
Some swear by the magical powers of a humidity dome, claiming their seedlings couldn’t survive without one. Others think it’s all a load of hot air and their seedlings thrive dome-free.
Sure, using a humidity dome can give you a leg up in the growing game, resulting in speedy germination and sturdy seedlings. But if you’re not in a rush and you’re confident in your growing skills, you might not need one. Simply keep your babies hydrated and bask them in sunny warmth.
I suggest experimenting to find what works best for you and your seedlings. Personally, I did a little test – planting tomatoes with and without a humidity dome – and found that the domed ones germinated a few days faster. While the undomed ones eventually caught up, the humidity dome definitely gave them a head start.
How to use a humidity dome?
Congratulations on acquiring a humidity dome – let’s put it to good use!
After planting your seeds in the soil as per the instructions, it’s time to bring out the dome. Place it over your precious seedlings, ensuring it’s tall enough to accommodate their growth.
And voila!
You’ve created a cozy, humid greenhouse for your plant babies to thrive in.
Where to place the humidity dome?
Location, location, location – it matters for your humidity dome too! The ideal spot for your dome is a sunny windowsill, allowing your seedlings to bask in as much sunlight as possible.
But don’t forget about warmth! Usually, seedlings require a soil temperature of at least 70 degrees Fahrenheit (20 Celsius) to germinate successfully. A south-facing window is usually the best option, but you can also use a heat mat or grow light to keep the seedlings warm if necessary.
Keep an eye on the temperature inside the dome, though – too much heat can be harmful to your seedlings. So let there be light, but not too much!
How to water seedlings in the humidity dome?
Watering your seedlings with a humidity dome requires a delicate touch. While the humidity dome helps keep the soil moist, it also increases the risk of fungal diseases, so you want to be mindful not to overwater.
Check the soil daily and water as needed to maintain moisture, making sure not to soak the soil. A good rule of (green) thumb is to water when the top of the soil starts to look dry.
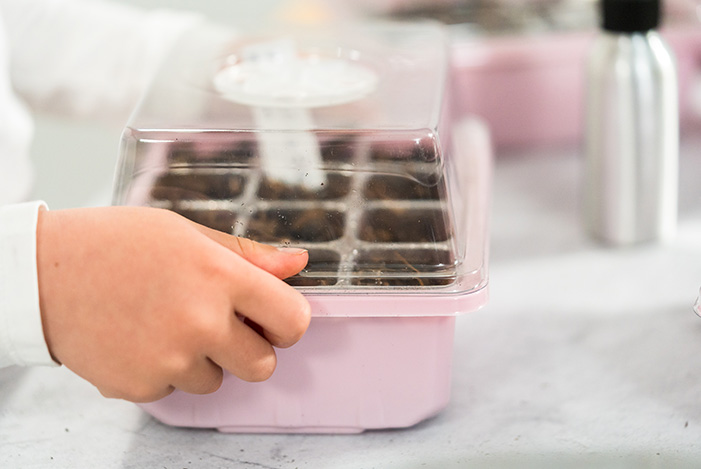
If you want to keep the humidity high without drenching the soil, use a spray bottle to mist the seedlings. Just don’t go overboard with the misting, as too much water can still be harmful to your delicate little ones.
When to vent the humidity dome?
When using a humidity dome, ventilation is key to keeping your seedlings healthy and happy. Without proper airflow, too much moisture can build up and cause problems.
To prevent this, open the humidity dome for a few minutes every day or whenever you notice condensation building up inside. Raising the dome a few inches can also help improve air circulation.
But don’t keep the dome open for too long, as this can lead to the seedlings drying out. So, let the air in, but keep a watchful eye on your little ones to make sure they don’t dry out or get too much exposure.
When to remove the humidity dome for seedlings?
So, how long to keep seedlings in the humidity dome?
Once your seedlings have sprouted and are growing well, it’s time to remove the humidity dome. However, you should do this gradually to prevent shocking the plants. Start by leaving the dome off for a few hours each day and gradually increase the time over the course of a week or two.
Keep an eye on your seedlings during this period, as they may be sensitive to sudden changes in temperature or humidity. If they start to look wilted or stressed, put the dome back on for a little while longer.
Once the seedlings have acclimated to their new environment, you can remove the dome completely. At this point, they should be strong enough to thrive on their own as long as they are getting enough sunlight and water.
What’s the best humidity done for seedlings?
I would divide humidity domes into 2 categories – store-bought or DIY.
DIY humidity dome for seedlings
Want to flex your creative muscles and save some cash? Try making your own humidity dome! You could use a clear plastic container like a takeout box or storage bin, just make sure it’s big enough to fit over your seedlings without giving them a claustrophobic panic attack. Poke some holes in the lid for ventilation and voila – an instant greenhouse!
Another option is to use a clear plastic bag. Yes, really. Just pop your seedlings inside, twist tie or rubber band it shut, and poke some holes in the bag for ventilation.
Now, I won’t lie to you – these homemade humidity domes aren’t the most durable or effective for regulating humidity and temperature. But they’re a great way to experiment with different growing conditions without breaking the bank. Plus, who doesn’t love a good upcycling project?
3 Best Store-bought Humidity Domes for Seedlings
As a green-thumb enthusiast, I embarked on a journey to find the perfect humidity dome. Lo and behold, I scoured the vast garden section of Amazon and uncovered some absolute gems. These budget-friendly domes promised speedy and stress-free seed germination.
So, without further ado, let’s take a gander at the top 3 contenders in the market.
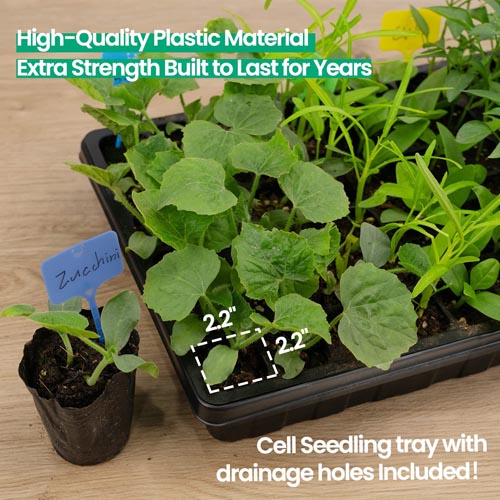
Budget-Friendly Option: MIXC 10 Packs Seed Starter Tray Seed Starter Kit with Humidity Dome


It doesn’t get much simpler than this. You get 10 clear plastic trays with matching humidity domes. Each tray has drain holes to prevent overwatering and a little label space so you can keep track of what’s growing where.
MIXC humidity dome has a little vent hole to regulate moisture and temperature. It’s all quite simple but there’s no hard Aerogarden type of science needed – this humidity dome will do the work for you.
The plastic is quite thin but you handle it gently, it’s also reusable which is an added bonus. You can even get these in 4 different colors which I found quite fun. If you want an all-in-one, simple and affordable solution – this is it!
Best All-In-One Humidity Dome: 2 Set 60-Cell Seed Starter Kit
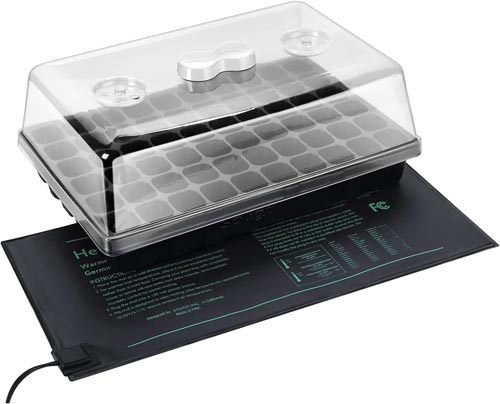
This is a great all-in-one solution if you want to get started with seedlings. It comes with 2 grow trays with 60 calls in each, 2 humidity domes and 2 germination heat mats.
The heat mats are great for keeping the soil warm, which is ideal for fast germination. This one has a higher quality plastic than the MIXC option making it more durable and possibly longer lasting.
The humidity domes have a little vent to regulate moisture and temperature. I like that this set comes with 2 trays so you can start a lot of seedlings at once. It’s also very affordable and would make a great gift for any gardener in your life (or yourself).
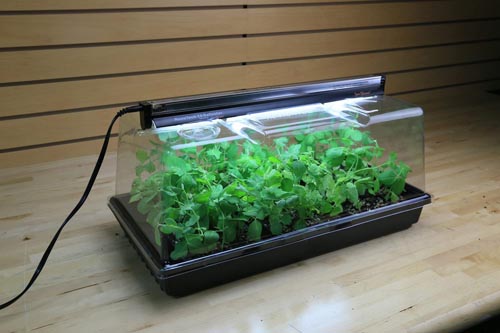
Includes light for low lit spaces: Super Sprouter Deluxe Propagation Kit with Grow Light
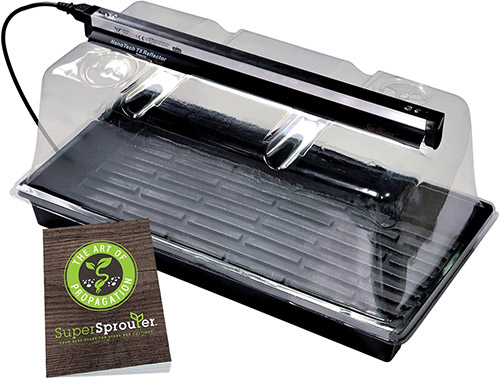

This Super Sprouter Deluxe Propagation Kit comes with everything you need to get started with seedlings – including a grow light. If you live in a place with limited natural light, this is a great solution.
It has a humidity dome, germination tray, and a T5 grow light. The tray doesn’t have drainage holes so you have to be careful not to overwater.
The humidity dome has 2 vents to help regulate moisture and temperature. I like that it comes with a grow light since it can be difficult to provide enough light for seedlings. It also doesn’t have separate “cells” which some people might actually prefer- it’s one big space to fill with soil allowing for more flexibility.
So, do you need a humidity dome for seedlings?
You don’t need a humidity dome for your seedlings, but why miss out on the fun? Using a humidity dome creates the perfect environment for germination and growth, resulting in faster and healthier plants.
Plus, they’re just really fun to use! If you’re looking for an easy and affordable way to get started with humidity domes, check out one of the options above.
Happy planting!